Auto-categorization of categories: Auto-categorization provides a major benefit to the company's workflow by automatically assigning the category to each of the expenses imported from the corporate card.
By detecting the merchant category code associated with the expense, the assigned category is selected. This way, users save time by not having to manually select the category, and approvers gain more confidence, since expenses will be linked to the correct account.
Users with the Administrator profile can perform this action by going to: Admin > Corporate Cards > Auto-categorization of Categories.
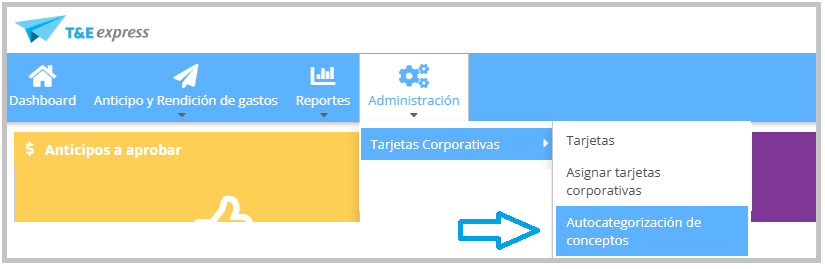
When you enter, you'll see the following screen.
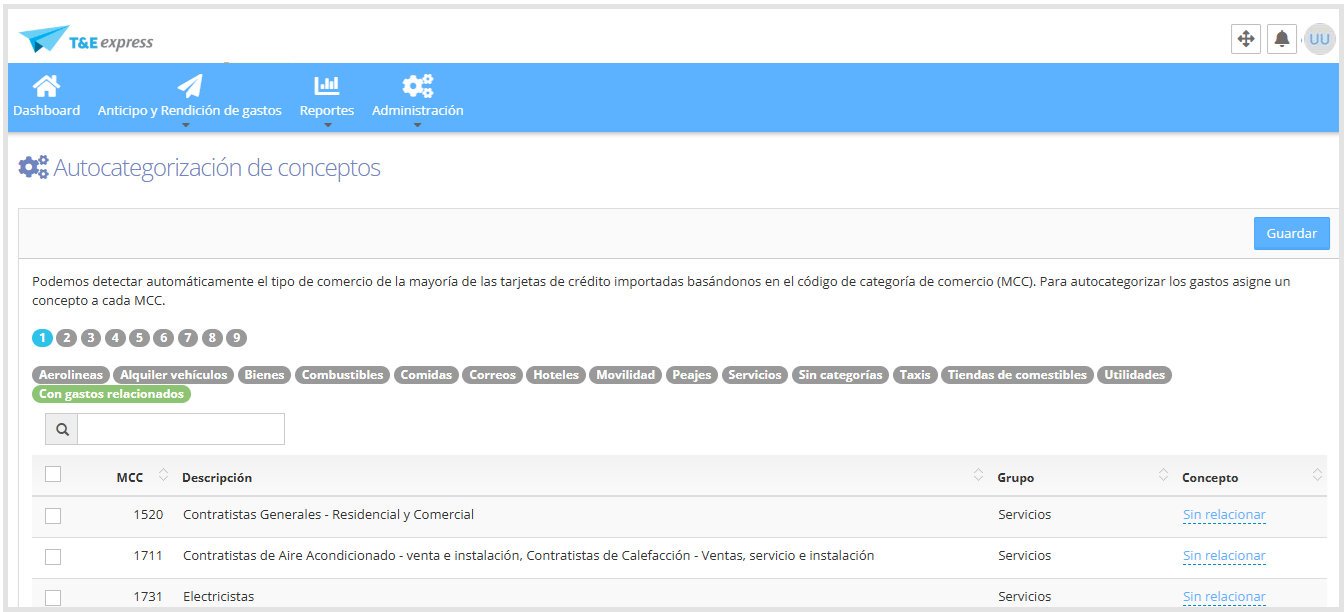
This screen shows a list of MCC codes, which identify the type of merchant where the transaction was made. Each row shows:
MCC: numeric merchant code.
Description: merchant type associated with the code.
Group: general category assigned by the system.
Category: field where you can select the category that will automatically apply to the expense.
To make administration easier, codes are grouped by categories. This lets you assign a category to an entire group of codes or, if preferred, to individual codes.

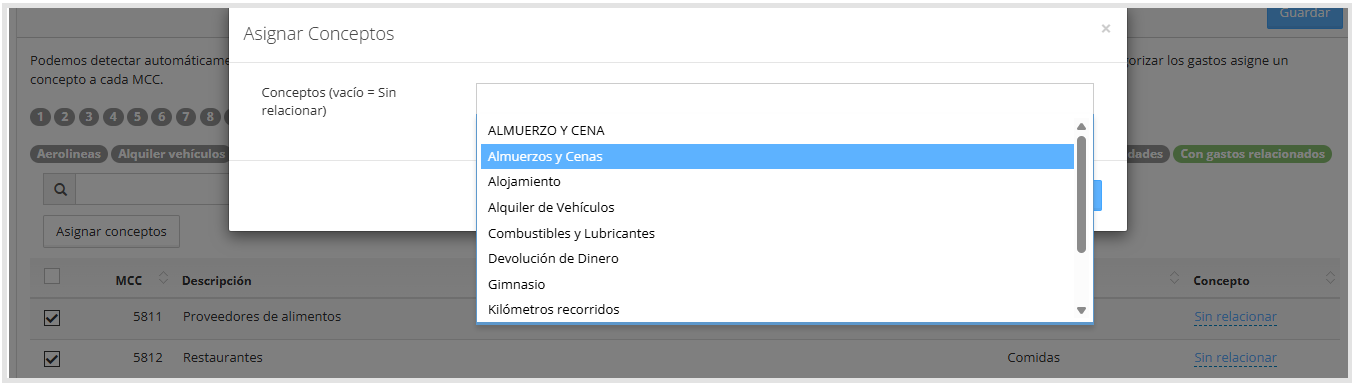
You can select multiple codes and then choose one or more categories using the selector located in the upper left corner, as shown in the image below.
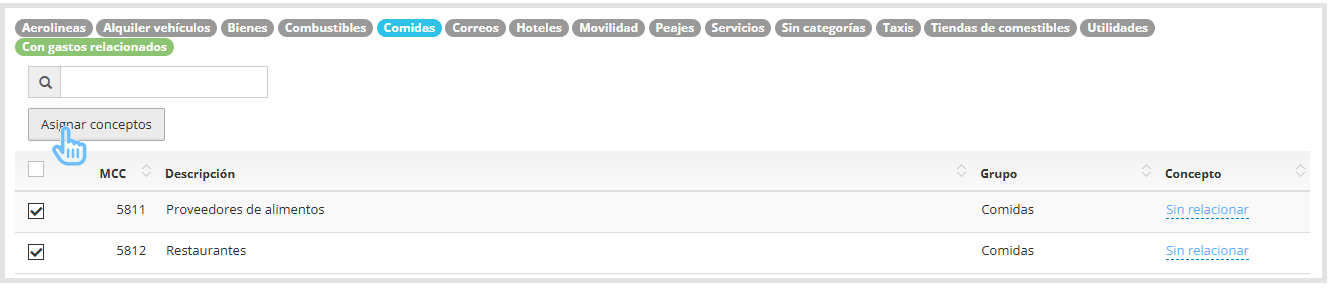
Clicking "Assign Categories" will open a window where you must select the category or categories to assign to the checked codes.
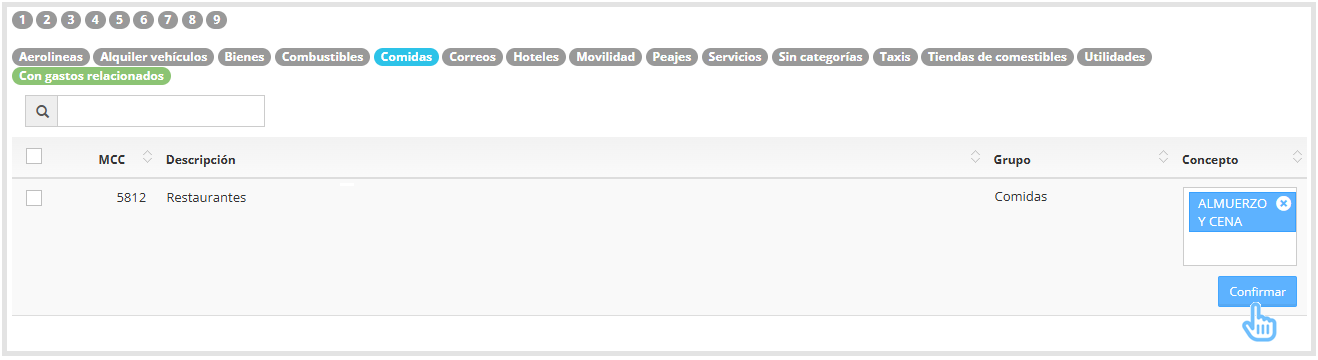
It's also possible to do this individually, by selecting the category directly from the "Category" column, as shown below.

After clicking, select the category and then click Confirm to complete the assignment.
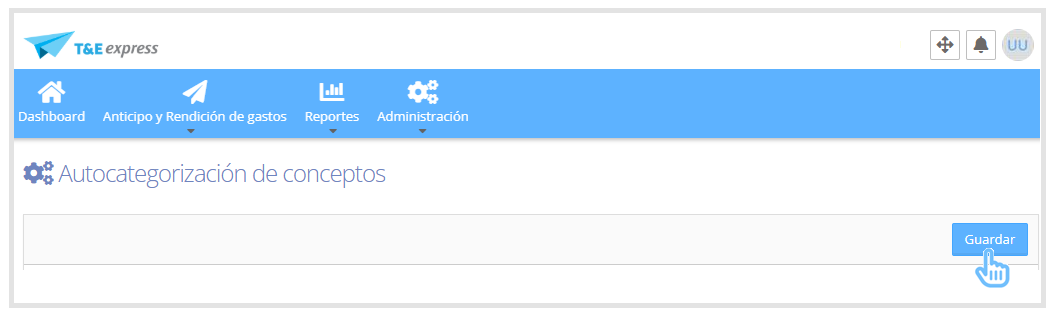
Once all codes have been assigned, click "Save", located in the upper right corner of the screen.