For more information on how to load GL Accounts, see the guide GL Accounts.
Category: To access Categories, go to Admin > Category.
To create a new category, click the icon

located in the upper right corner of the screen, as shown in the image below:

Clicking the (+) icon will open the following screen to fill in the new category's information.
You must complete the required fields, marked with an asterisk (*).
In the Description field, manually enter the description the user will see when reporting.
In the GL Account field, select an account from the available list, previously loaded into the system.
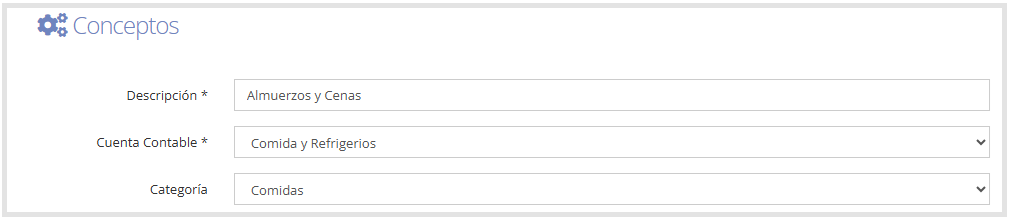
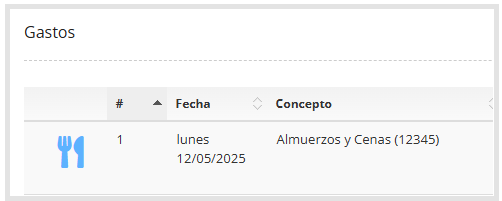
The Expense category field identifies the expense type. Depending on the selected expense category, the system shows a representative icon on the left side of the expense, as shown in the image below:
Accepts tip: if enabled, a field is enabled in the expense form for the user to enter a tip. This field will only be visible for cash and petty cash expense reports.
For more information on configuring the tip percentage, see the guide General Preferences.

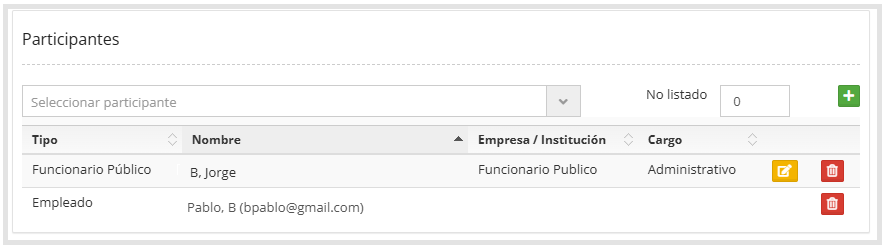
Allow entering attendees: if enabled, an additional field is enabled to indicate attendees on the expense form, within the expense report editing screen, as shown below.

Is cash advance surplus return: if enabled, it identifies the category to use when a user requested a cash advance and didn't use the full amount. In that case, an expense must be added to the cash expense report selecting this category to record the return of the surplus.

Do not post to accounting: if enabled, the category does not generate an accounting entry in the ERP — that is, it is not recorded.

Skip receipt requirement: if enabled, it won't be necessary to attach a receipt when reporting an expense under this category.

Kilometers entry: this field must be enabled if users are going to report kilometers. When enabled, a field is enabled on the expense form where the user must enter the number of kilometers (distance).

Show in cash expense report: if enabled, the category will be available when reporting cash expenses.

Show in corporate card expense report: if enabled, the category will be available when reporting corporate card expenses.

Show in petty cash expense report: If enabled, the category will be available in expense reports linked to petty cash.

Hide by default. Visible only for benefit: if enabled, the category will not be visible by default and will only be shown when the user has an active benefit that includes this category.

Category owner: lets you assign a responsible approver for this category. This approver will be the next to approve after the functional approvers.

Once you save the new category and its settings, the system will redirect you to the main categories screen. All created categories will be listed there.
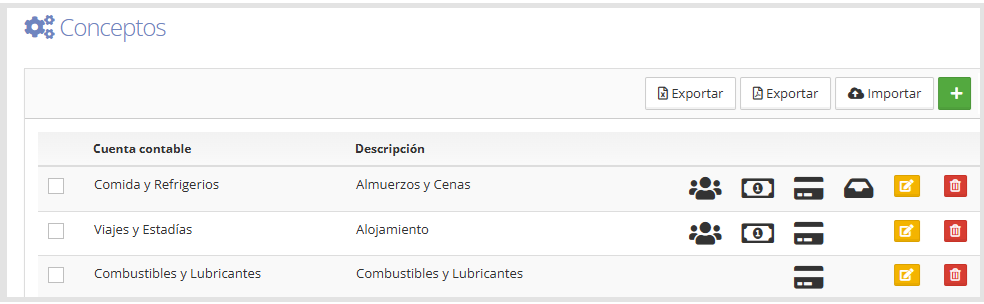
In the upper right corner of the categories screen, you'll find a series of buttons that let you perform different actions.
Export: downloads all the categories' information and configuration in Excel or PDF format.
Import: lets you upload categories from an Excel file (.xlsx).
Clicking this button opens a window where you can:
Select the file to import from your computer.
Download the corresponding template file from T&E Express.
Confirm the upload with the Import button, or cancel it.
On the right side of each category, we'll find different icons:
Allow entering attendees

This icon indicates that the category is enabled for entering attendees.
Cash expense report

This icon indicates that the category is enabled for cash expense reports.
Card expense report

This icon indicates that the category is enabled for card expense reports.
Petty cash expense report

This icon indicates that the category is enabled for petty cash expense reports.
Edit

Allows editing categories.
Delete

Allows deleting the created category.