This section details the creation of expense reports, either in cash or for expenses made with a corporate card.
The user will be able to select available cash advances, enter the corresponding expenses, attach receipts if they were already imported into the system, and also split an expense into several items from the Itemization tab
If the itemization option is not available, contact the support team to request its activation.
Expense Reports: Go to Travel & Expenses "T&E" > Expense Reports > New Cash Expense Report or New Card Expense Report.
IMPORTANT: "Card Expense Reports" should only be created when indicated by the administrator, as they are generated automatically at the end of the period.
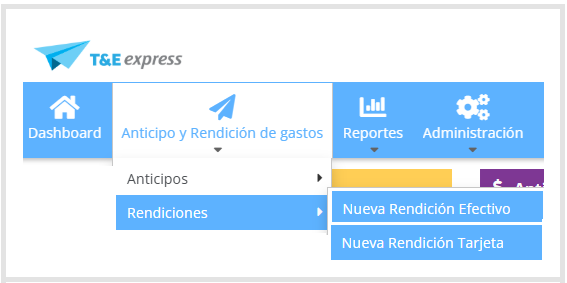
When you go to Travel & Expenses "T&E" > Expense Reports > New Cash Expense Report, you will see the following screen.
Fill in the expense report title to identify it.
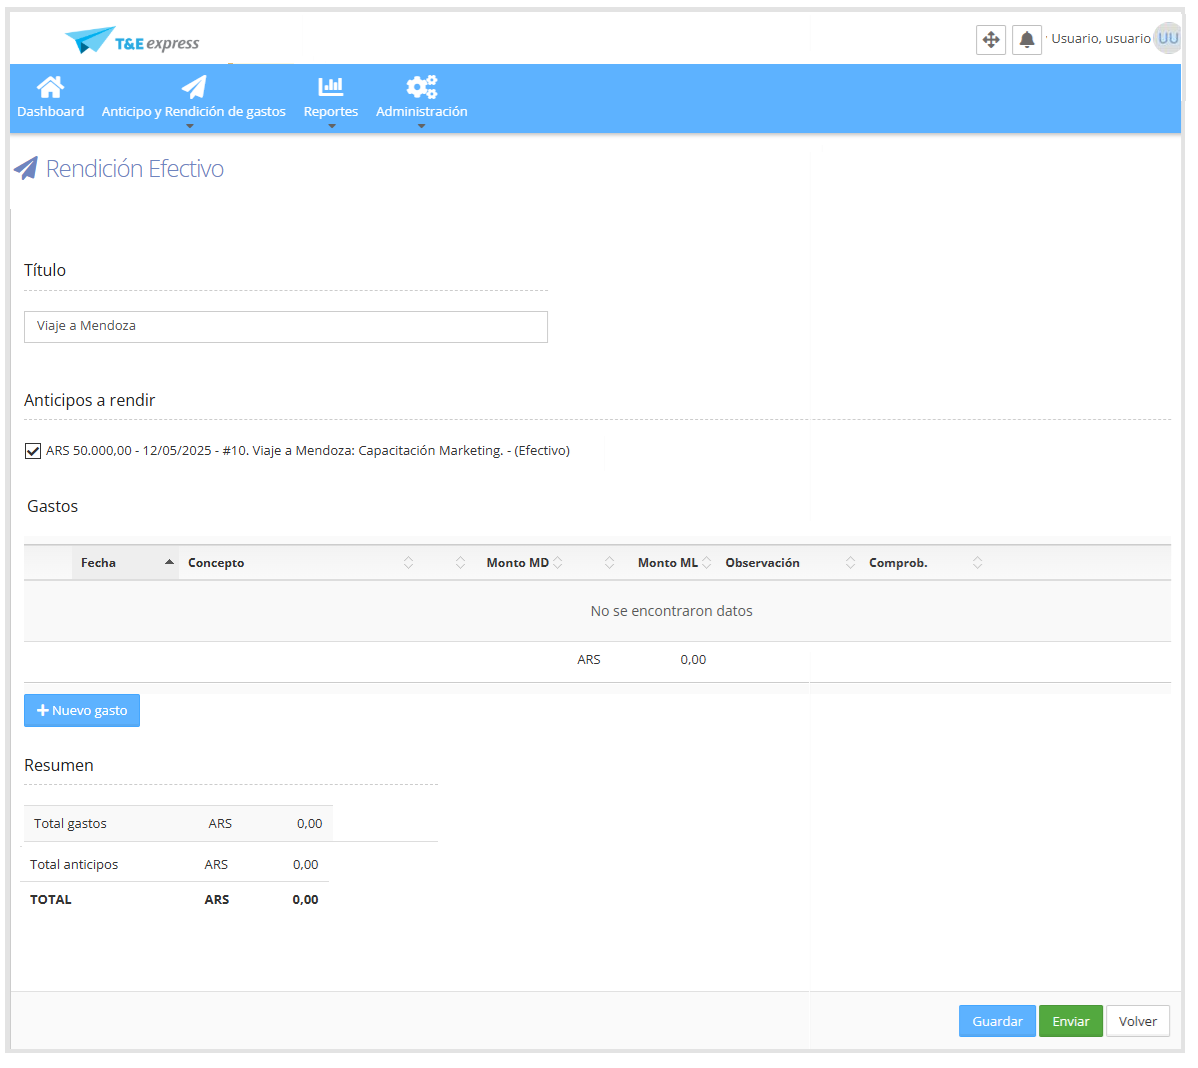
In the cash advances section, all cash advances with status "To report" will be displayed. To report them, select the corresponding cash advances by checking the box on the left side as shown below.

To add an expense to the expense report, click "New expense".
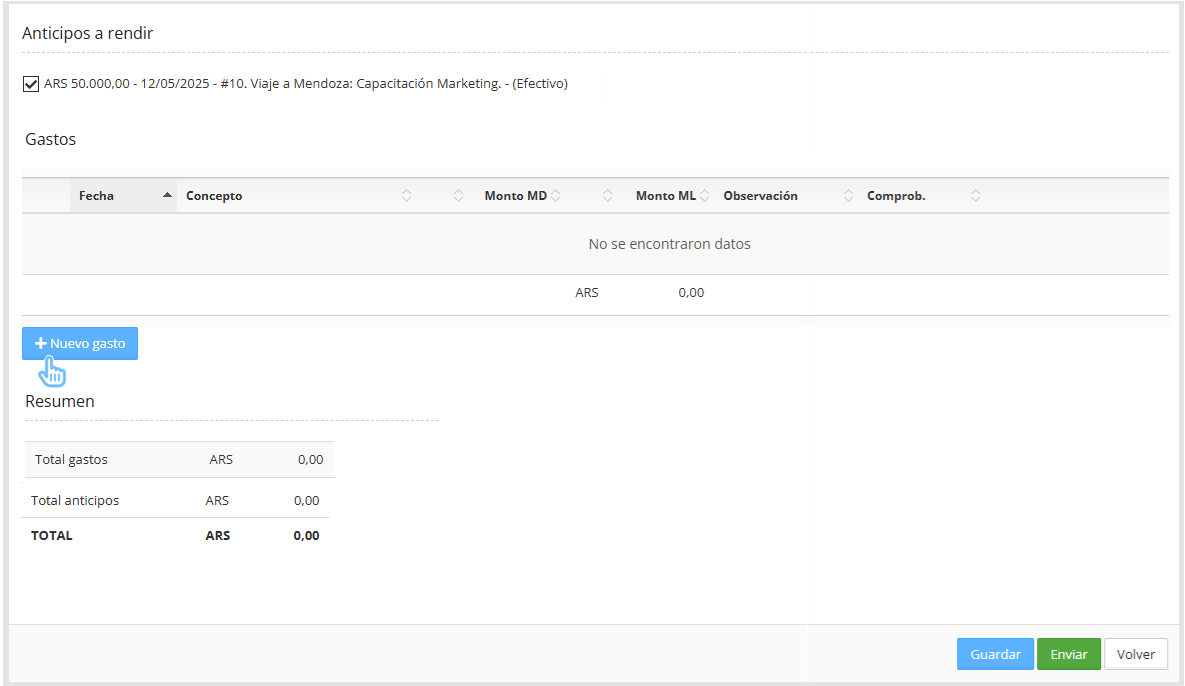
When you click "New expense", if there are imported receipts, they will be displayed so you can include them in the expense report by clicking the button.

To view all receipts, check the box that says "Show all", located on the left side, as shown below.
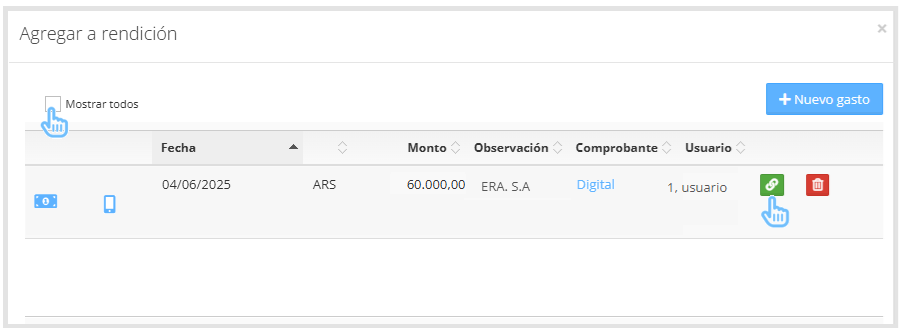
When linking an imported receipt, the system will automatically fill in the date, amount, and comment fields of the expense.
If you want to add a new expense, click the "New expense" button — a form will open where you must fill in the required fields marked with (*) as shown in the image below.
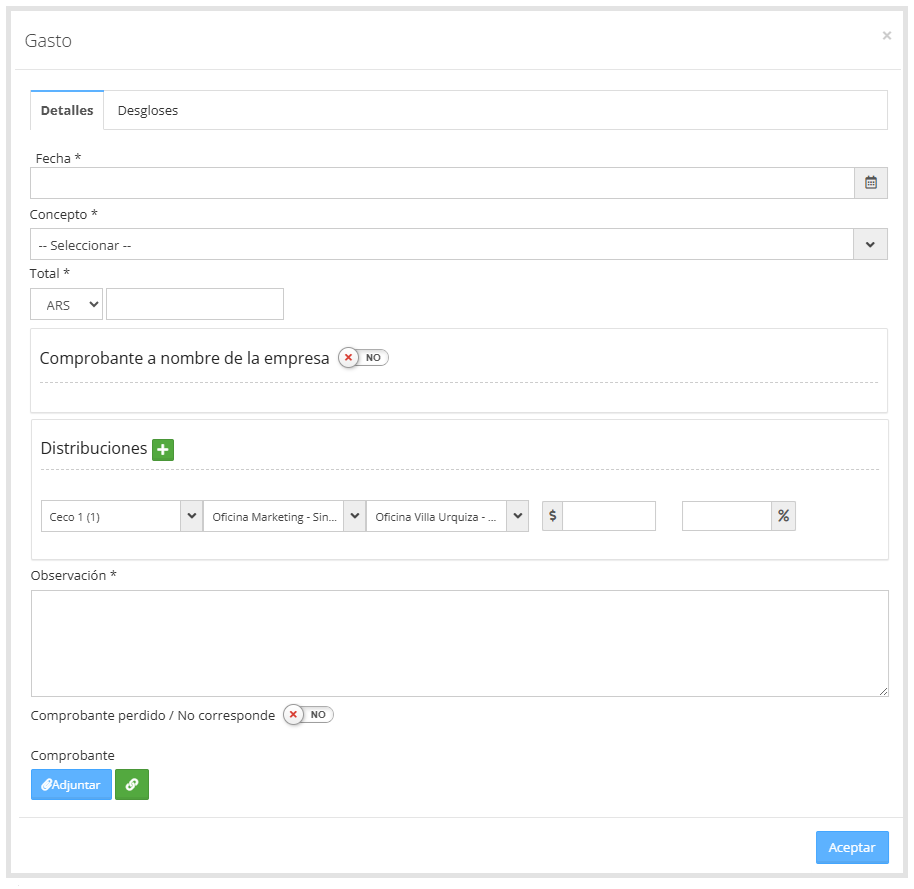
Tip: If the category is configured to allow "Tip", a new field will appear in the expense form.
This field will appear automatically once you have selected a category that has this option enabled. This field will only be visible for cash and petty cash expense reports.
As shown in the image below.

For more information on the "Tip" configuration, refer to the Categories guide
Receipt in the company's name: If you have a receipt in the company's name, enable the checkbox found in the expense form, and fill in the required fields marked with (*), as shown in the image below.
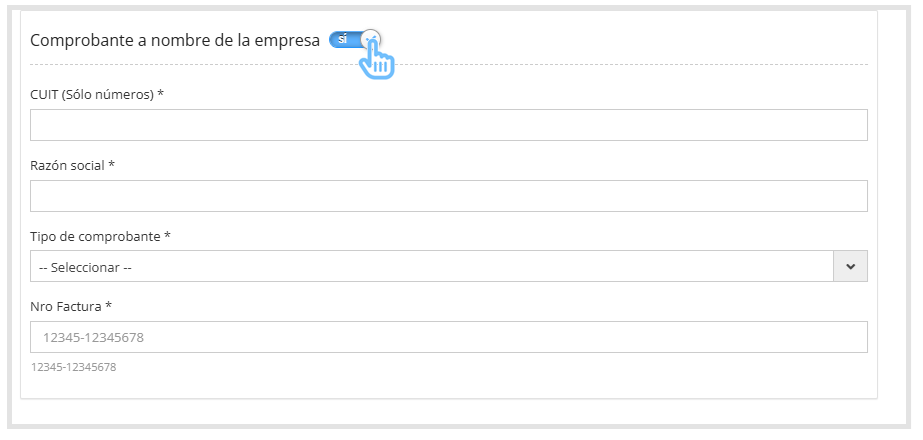
For more information on taxes and receipt types, refer to the Taxes and Receipt Types guide.
Attendees: If the category selected in the expense form allows attendees, a specific panel will be displayed where you can enter the attendees' details, as shown in the image below.
For more information on how to configure attendees, refer to the Categories guide.
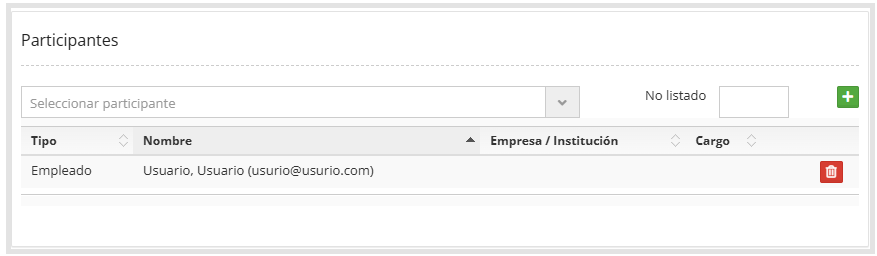
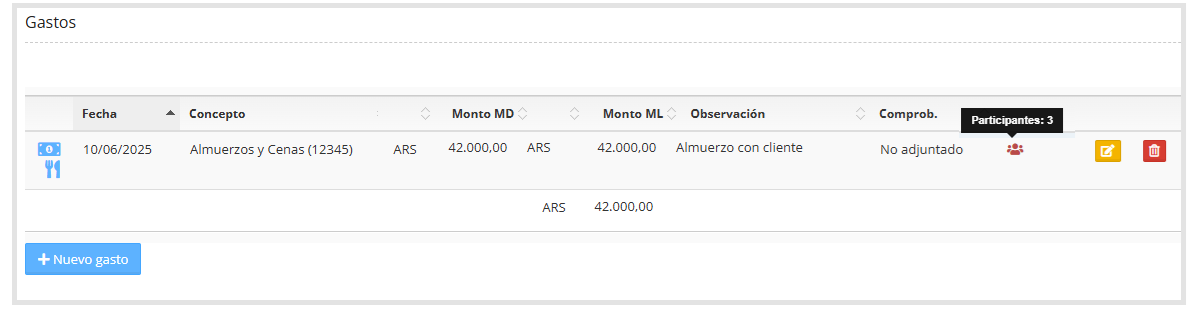
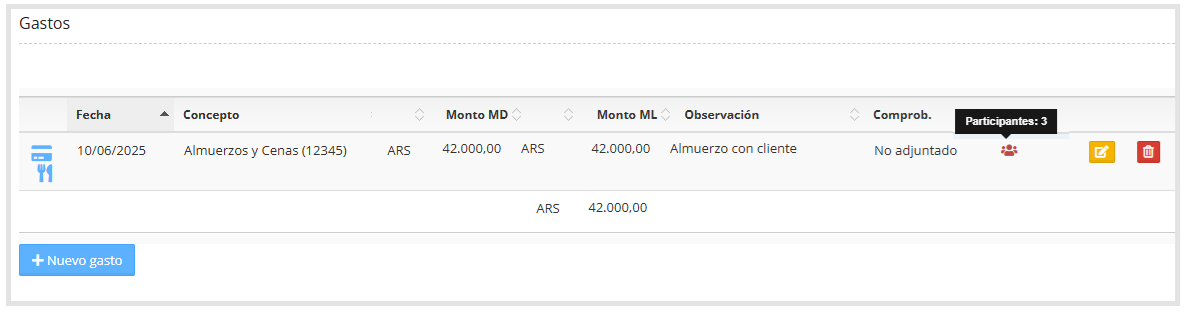
When attendees have been added to an expense, the expense report detail will display an icon indicating that there are attendees, as shown in the image below.
Exceeds limit: If the "category limit per expense" has been configured, when adding an expense that exceeds this limit, the system will display a box where the user must justify the reason, as shown below.

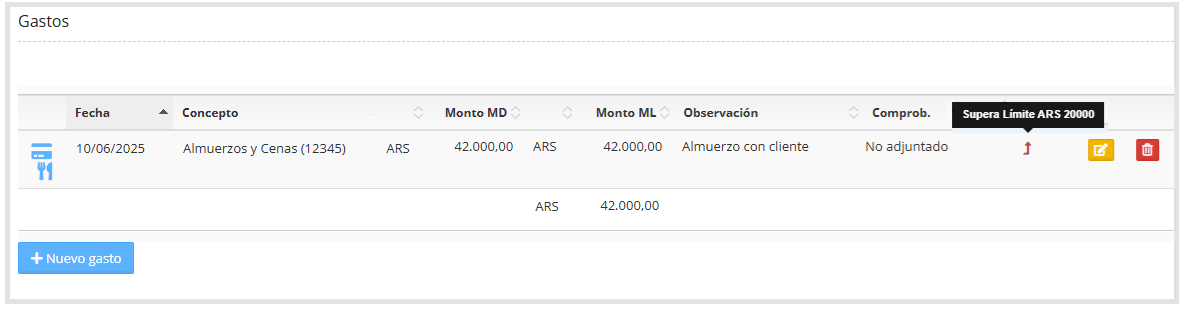
In the expense report detail, an icon will be displayed indicating that the expense limit has been exceeded, as shown in the image below
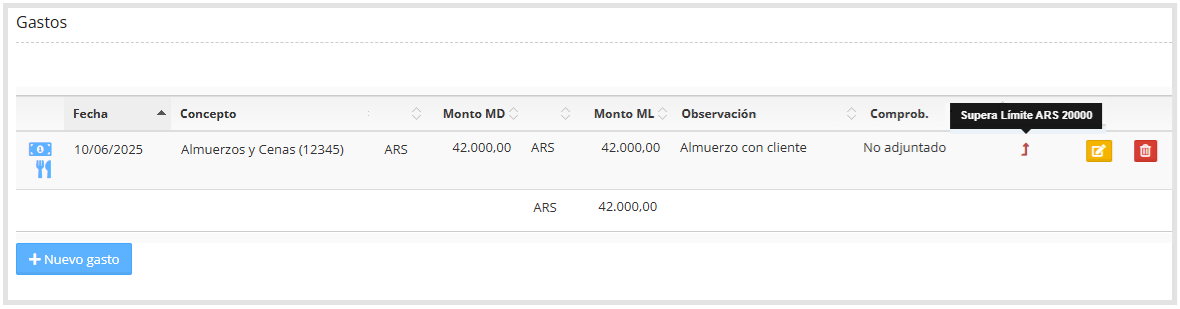
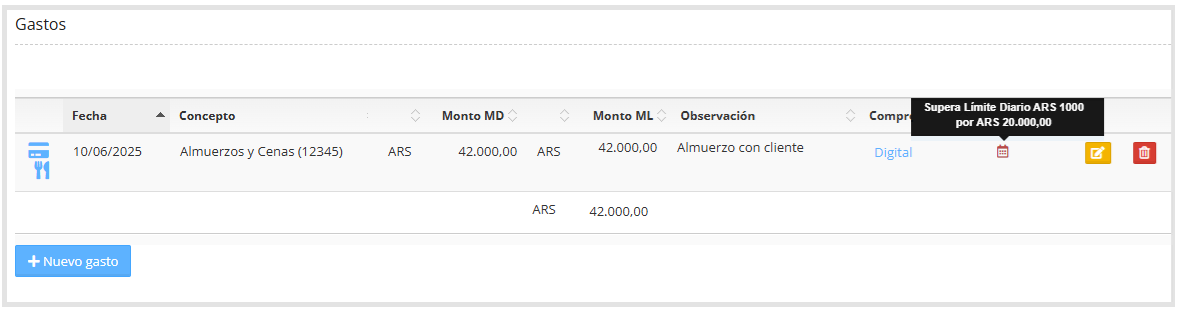
Exceeds daily limit: If the "category limit per day" has been configured, when adding an expense that exceeds the limit, an icon with the excess detail will be displayed in the expense report detail, as shown below.
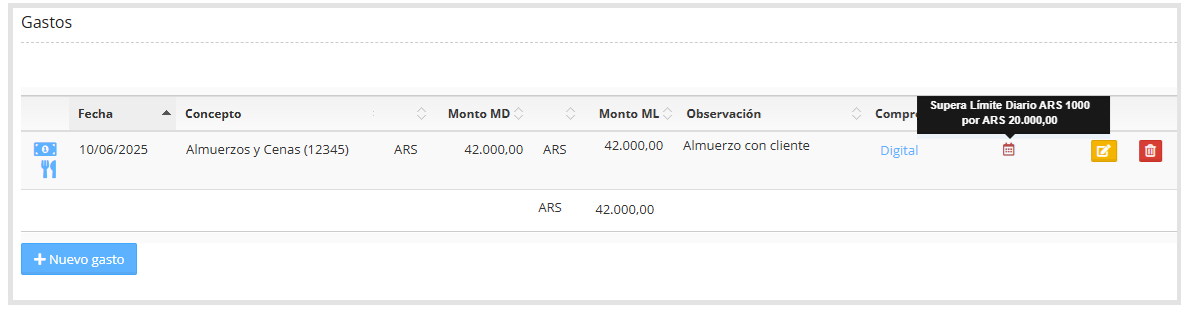
For more information on category limit configuration, refer to the Category limit guide
Cost center: If the user has the option "Can report expenses to other cost centers" enabled, a selector will appear in the expense form where they can choose another available cost center.

For more information on this configuration, refer to the Users guide.
If Distributions has been configured and the option "Can report expenses to other cost centers" has been enabled, the cost center selector will no longer appear as a separate field. The cost center selection will be done within the Distributions section in the expense form.
For more information on this configuration, refer to the Allocations guide.
As shown in the image below:
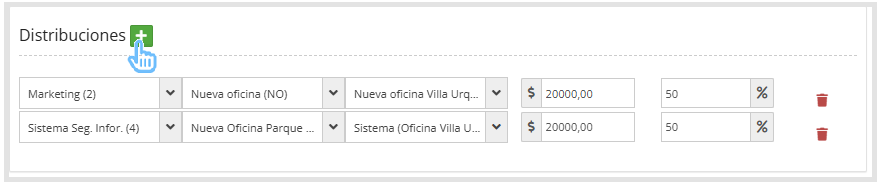
If the + icon does not appear, contact the T&E Express technical team.
Trip: If the trip option is configured, this field will appear in the expense form.

When registering a new expense and filling in the date, the system will automatically list the corresponding trip within that date range.
For more information on this configuration, refer to the Registering trips in T&E Express guide.
Once all required fields have been filled in, if you need to break down the expense, you can do so from the Itemization tab, located within the same form, as shown in the image below.
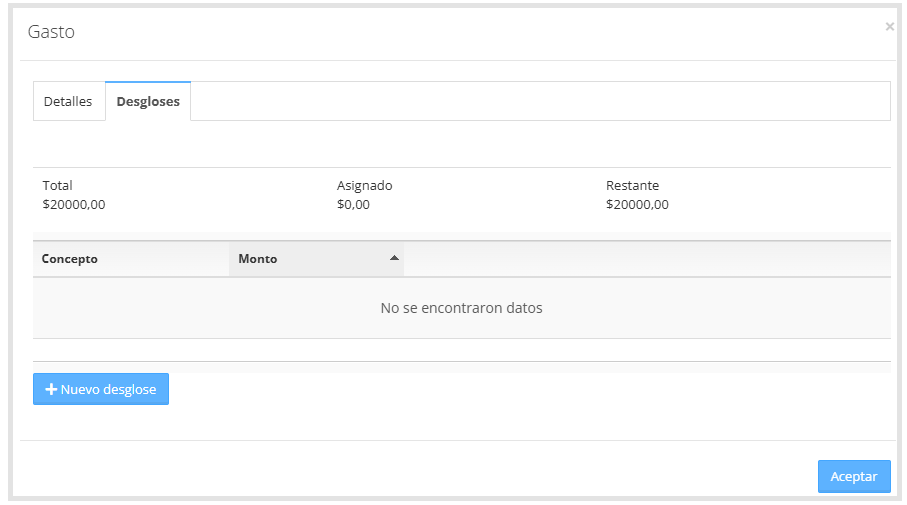
From this tab you can add separate items that correspond to the same expense.
By clicking "New itemization" each line is added independently, allowing you to distribute and detail each part of the expense precisely.
All lines must add up to the total amount of the main expense, as shown below.
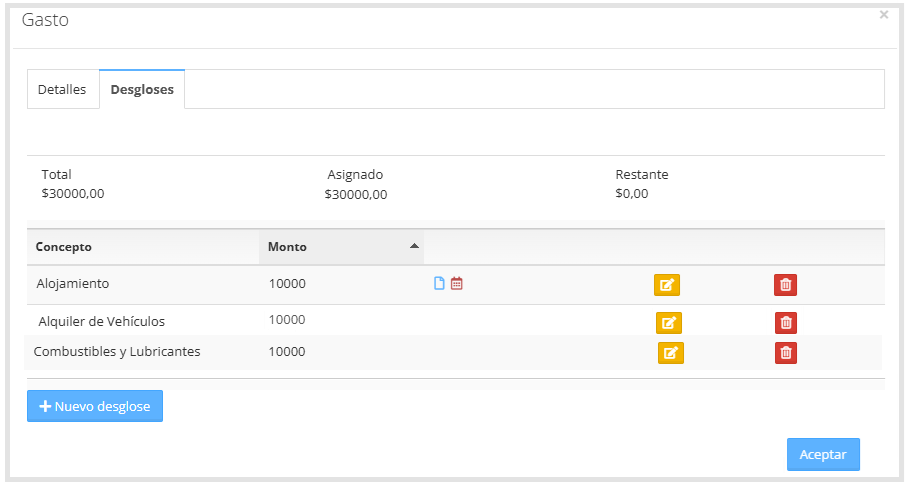
For more information, refer to the Expense Report with Itemizations guide.
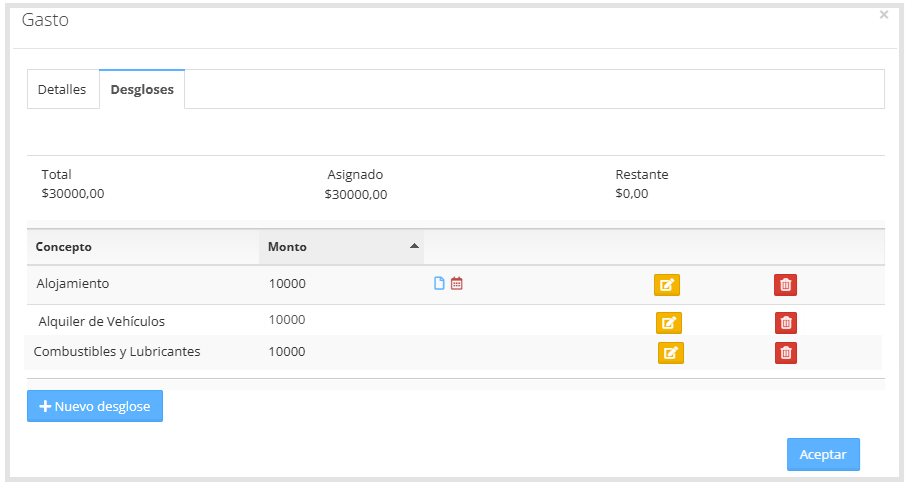
Once all itemizations have been entered and you click Accept, the system will redirect you to the expense report detail screen.
Where you will see the following icon, located on the right side, as shown below.

This icon indicates that the expense has an itemization and may include additional details such as loaded taxes, daily limit overages, among others.
By clicking on the icon, you will be taken to the itemization screen, where you can view the loaded information, with the option to edit or delete individual itemizations.
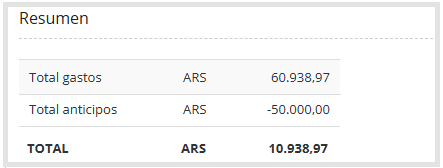
Once all data has been entered and you click "Accept", the system will automatically offset the selected cash advances against the loaded expenses, as shown in the image below.
The expense report can be saved as a draft to continue later, or you can click the "Submit" button, both located in the bottom right corner of the screen.
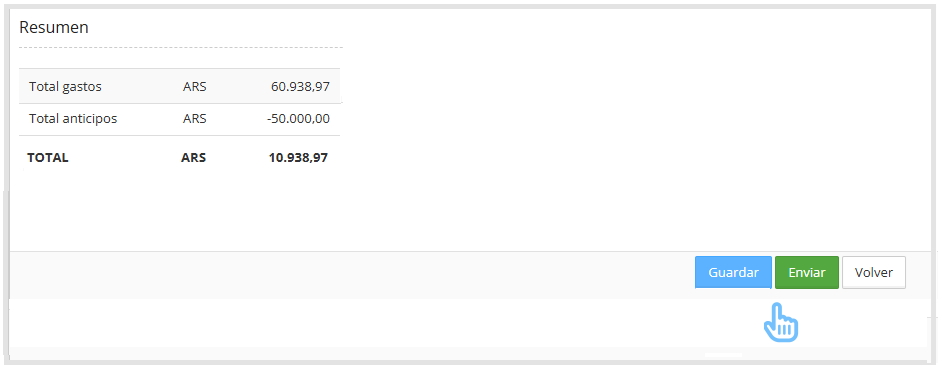
Once submitted, the approver will receive a notification requesting approval.
T&E Express will send an email every time the expense report changes status.
Kilometer expense report: This option will only be available to users that the administrator has indicated can report kilometers.
A distance field is enabled, along with the map, which allows you to indicate the route taken.
If the map does not appear in the distance field, contact the T&E Express technical team.
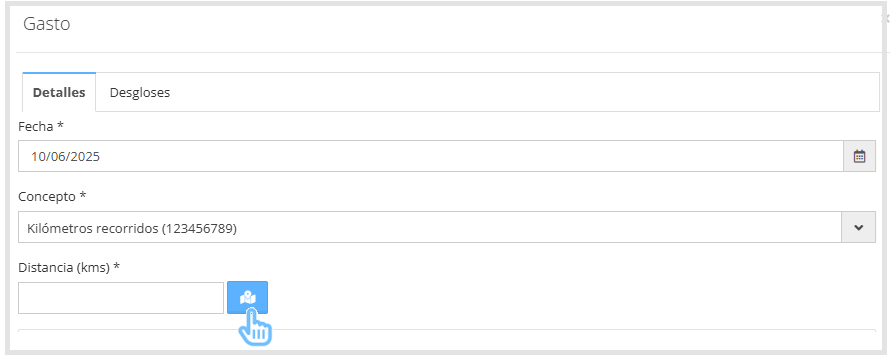
When you click on the map icon, the following box will open to enter the locations.
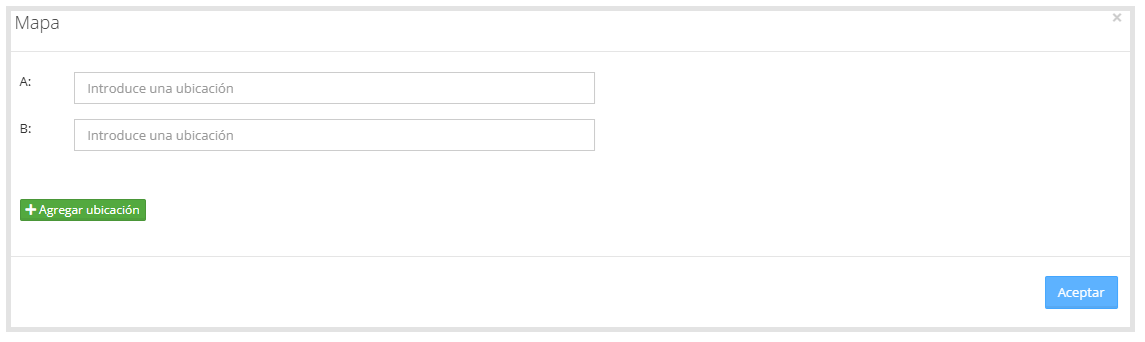
Once the locations are filled in, the system will automatically calculate the distance, as shown below:
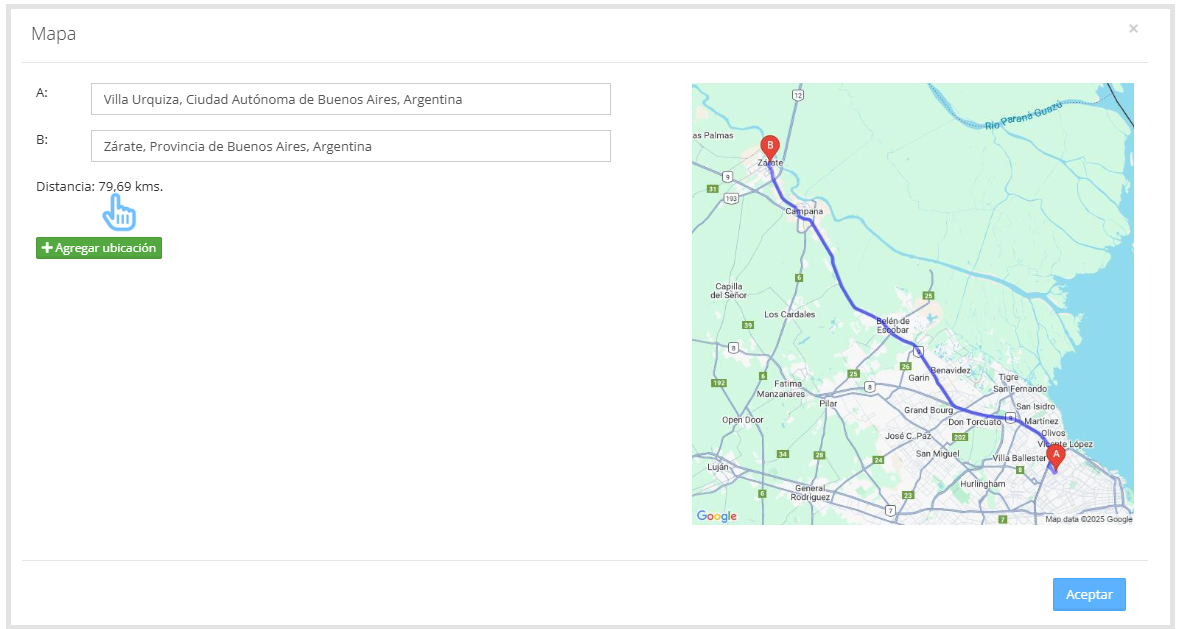
If you need to add more locations, click "Add location".
A new field will be added and the option to delete previously entered locations will appear, as shown in the image below.
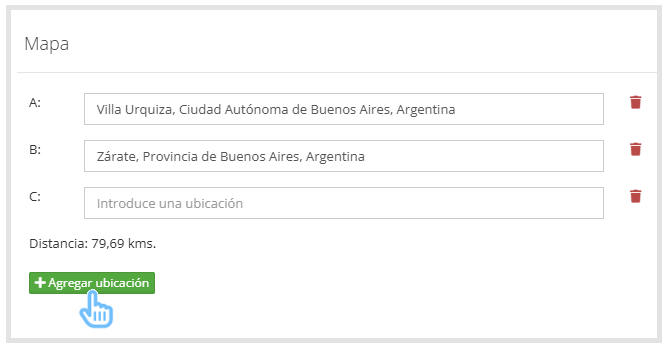
When finished, click "Accept" and the system will automatically load the kilometers traveled in the distance field.
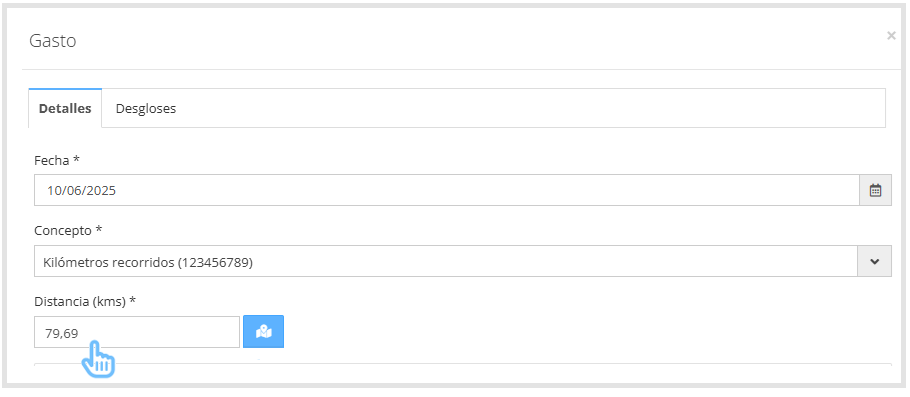
T&E Express will automatically calculate the reimbursement amount based on the configured km rate.
As shown in the image below.
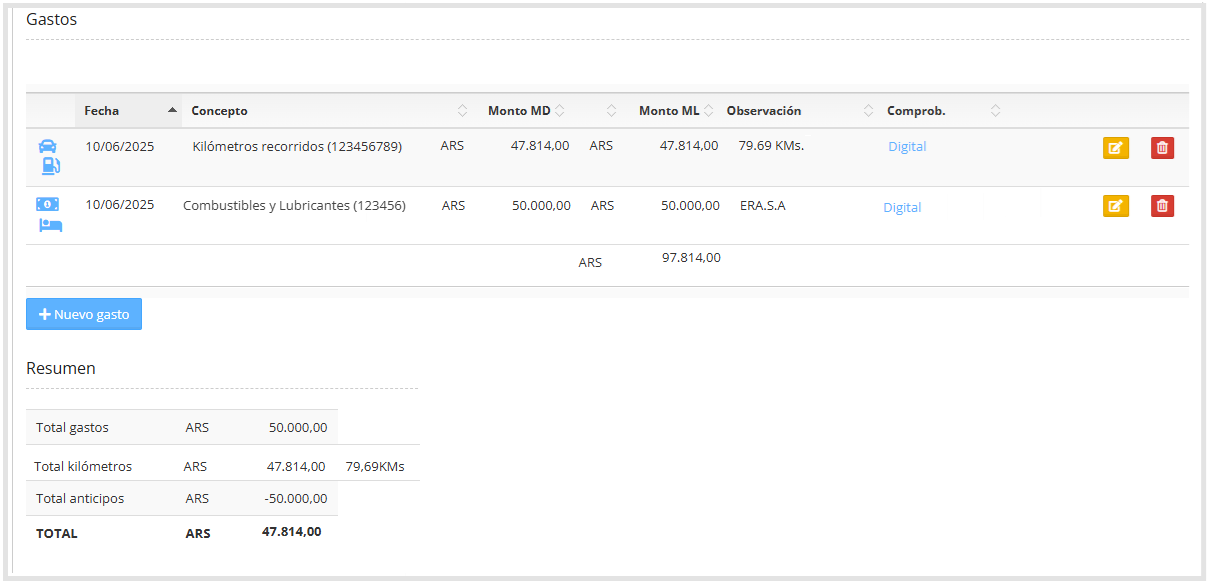
For more information on its configuration, refer to the Km Rate guide.
Below you will find the following Cash Expense Report video.
Automatically generated corporate card expense report: Once the period has ended, the system automatically generates an expense report in draft status with the expenses made with the corporate card.
The user will receive an email notification informing them that the expense report is now available to complete.
You can access the expense report in two ways:
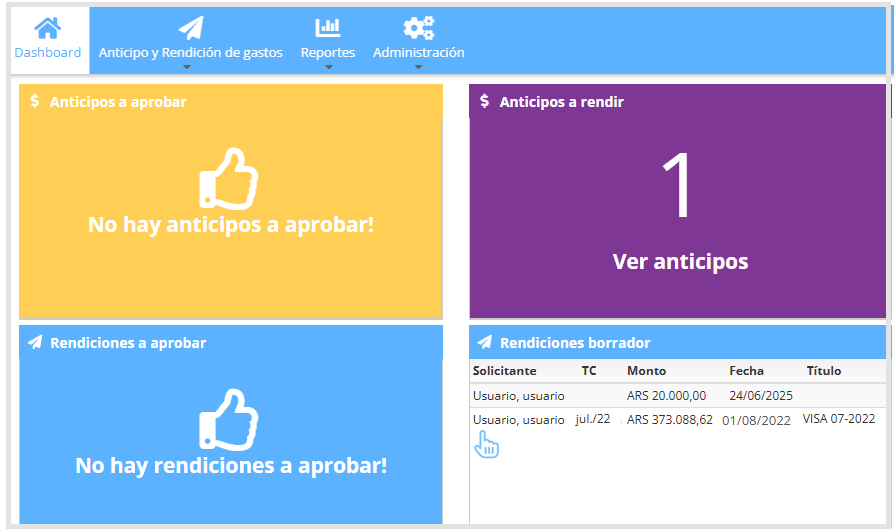
From the Dashboard, in the Draft Expense Reports panel, as shown in the image below.
From Travel & Expenses "T&E" > Expense Reports > Expense Reports List, select the corresponding expense report and click the icon.

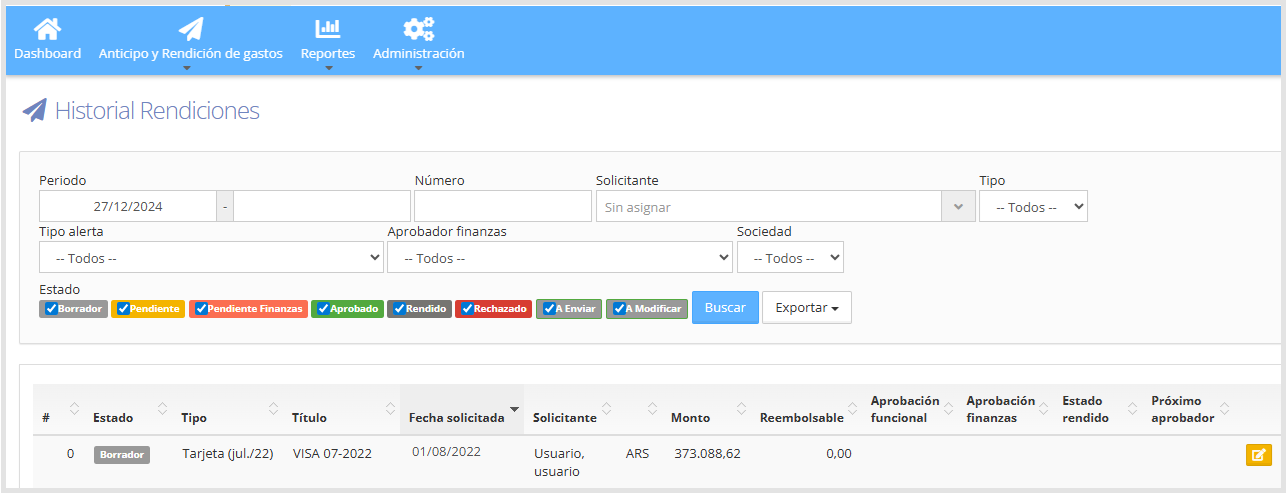
When accessing an expense report automatically generated by T&E Express, you will see the expense report title, the period it refers to, and a list of expenses made with the corporate card.
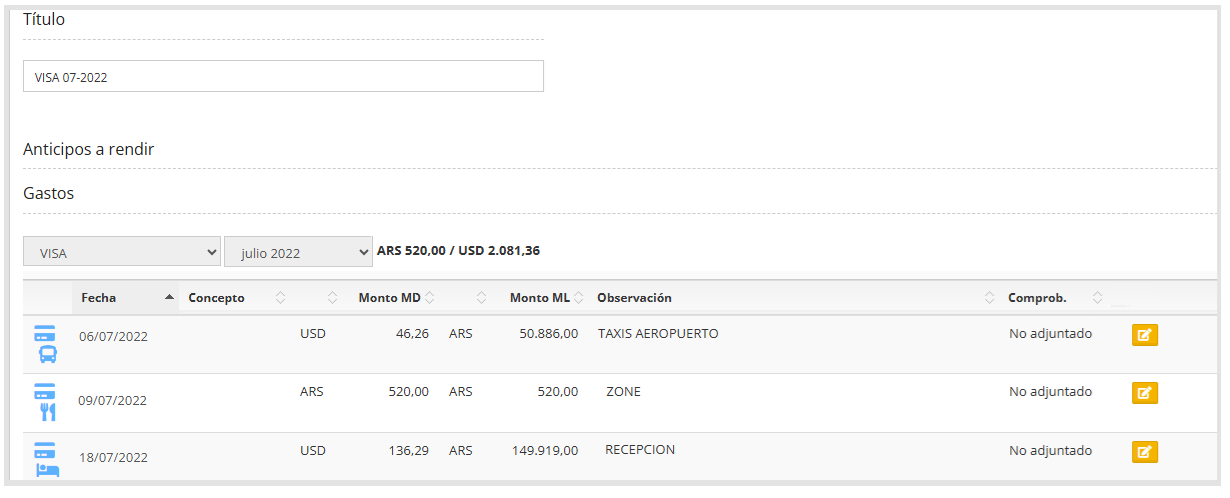
The user must click the edit icon

to fill in the empty fields and update the comment to detail the expense more precisely.
If the itemization configuration is enabled, when editing a corporate card expense the itemization tab will also be available within the form. From here the expense can be split into several items.
It is not possible to modify the Date or Amount values, nor to delete or add new expenses in this type of expense report, as shown in the image below.
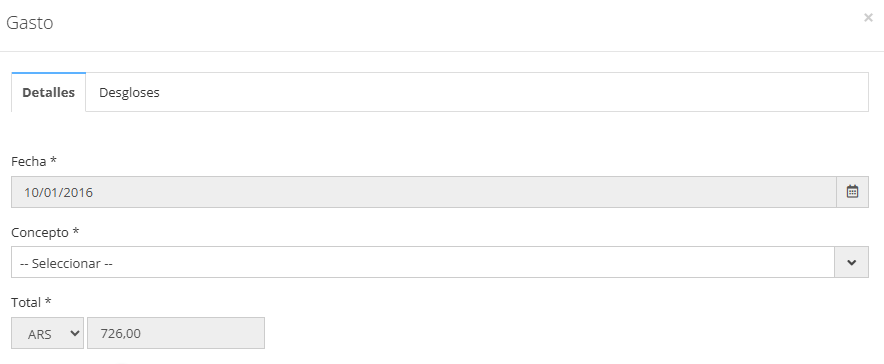
To attach an imported receipt, click the button

located next to the Attach button.
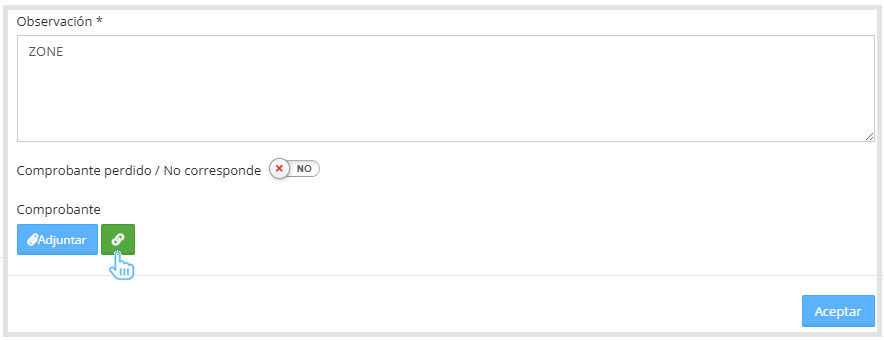
This will display the list of available imported receipts.
To view all receipts, check the box that says "Show all", located on the left side.
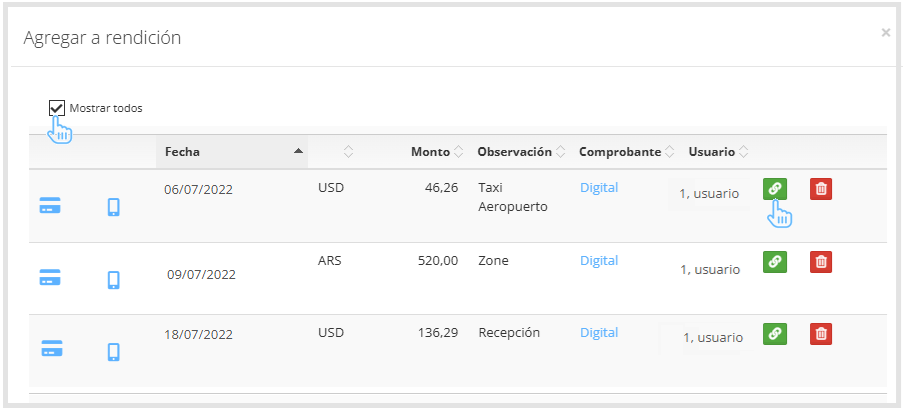
To link a receipt to the corresponding expense, click the button located next to the Attach button.

Assign expense as personal: If personal expenses were made with the corporate card, the user must select the "Personal expense" field, as shown in the image below.
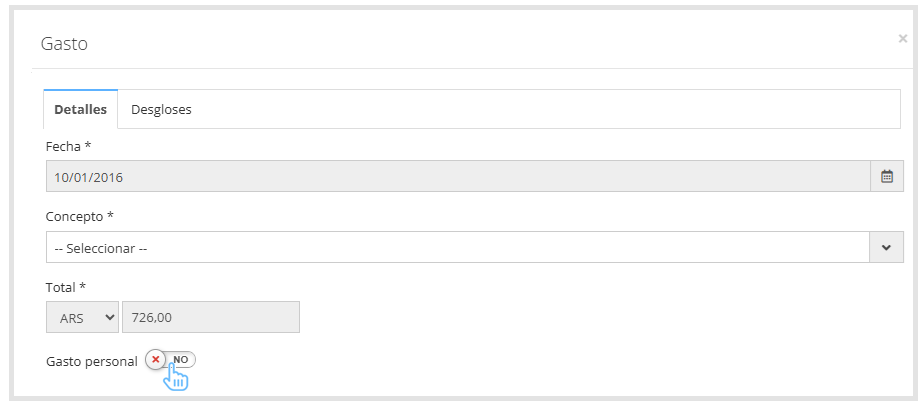
When enabling the "Personal expense" option, a message will appear in red.

Once entered, the expense report detail will display the icon

on the far right of the expense, indicating it was marked as a personal expense, as shown below.

Assign expense as unrecognized: If an expense made with the corporate card is not recognized, the user must check the "Unrecognized expense" field in the expense form.
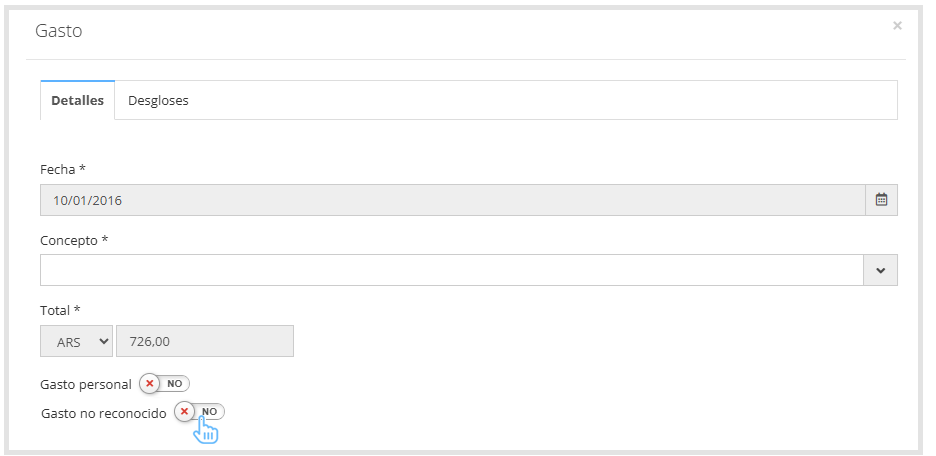
When enabling the "Unrecognized expense" option, a message will appear in red indicating that the user must file a claim and follow up with the credit card company.

The claim number must be added in the Comment field in the expense form.

Once entered, the expense report detail will display the icon

on the far right of the expense, indicating it was marked as an unrecognized expense, as shown below.

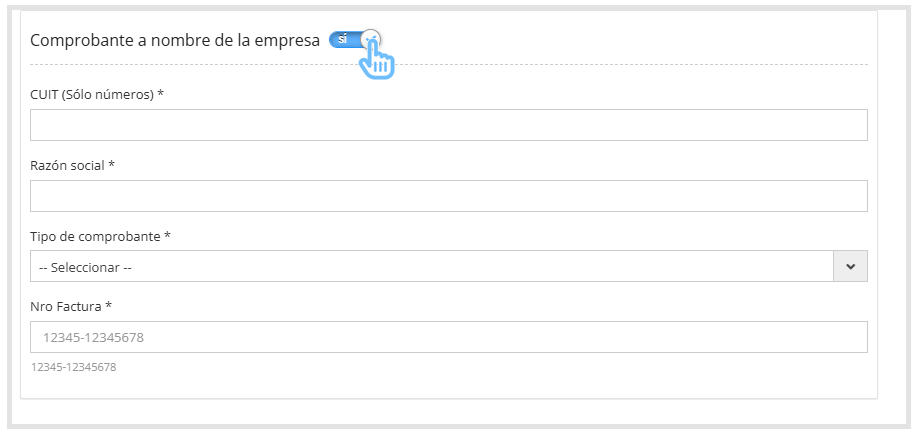
Receipt in the company's name: If you have a receipt in the company's name, enable the checkbox found in the expense form, and fill in the required fields marked with (*), as shown in the image below.
Attendees: If the category selected in the expense form allows attendees, a specific panel will be displayed where you can enter the attendees' details, as shown in the image below.
For more information on how to configure attendees, refer to the Categories guide.
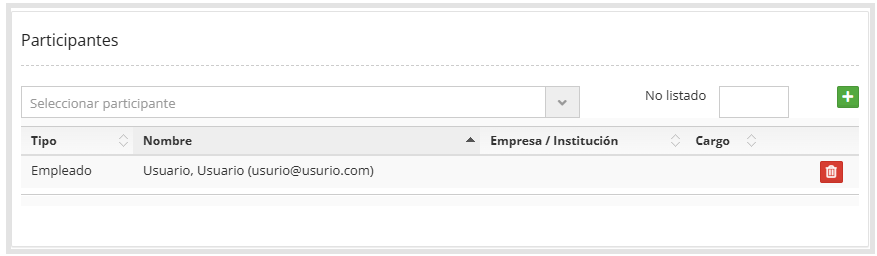
When attendees have been added to an expense, the expense report detail will display an icon indicating that there are attendees, as shown in the image below.
Exceeds limit: If the "category limit per expense" has been configured, when adding an expense that exceeds this limit, the system will display a box where the user must justify the reason, as shown below.

In the expense report detail, an icon will be displayed indicating that the expense limit has been exceeded, as shown in the image below.
Exceeds daily limit: If the "category limit per day" has been configured, when adding an expense that exceeds the limit, an icon with the excess detail will be displayed in the expense report detail, as shown below.
Once all required fields have been filled in, if you need to break down the expense, you can do so from the itemization tab, located within the same expense form, as shown in the image below.
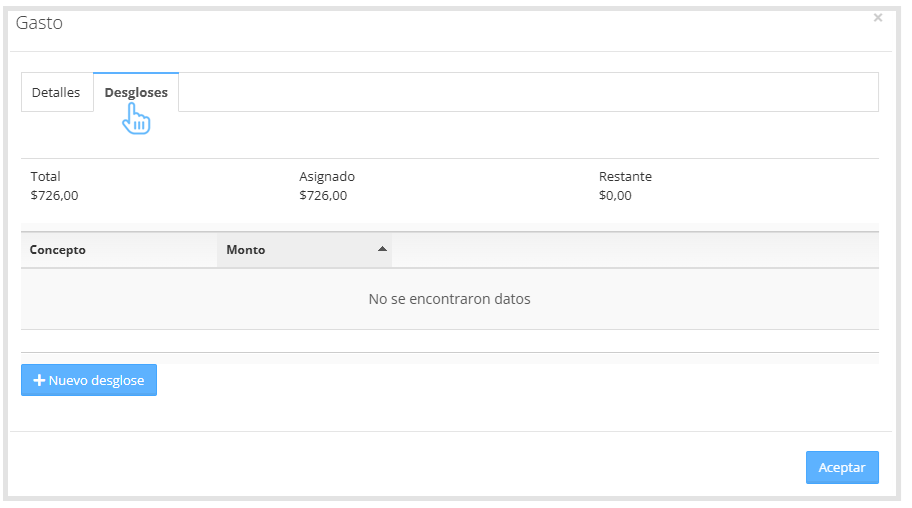
From the itemization tab you can add separate items that correspond to the same expense.
By clicking "New itemization" each line is added independently, allowing you to distribute and detail each part of the expense precisely.
Note that the Date and Currency are inherited from the main expense and cannot be modified in the itemization.
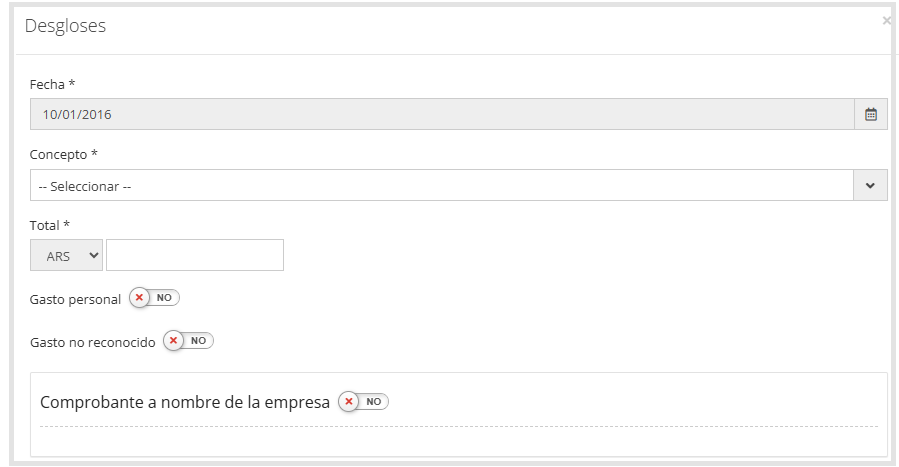
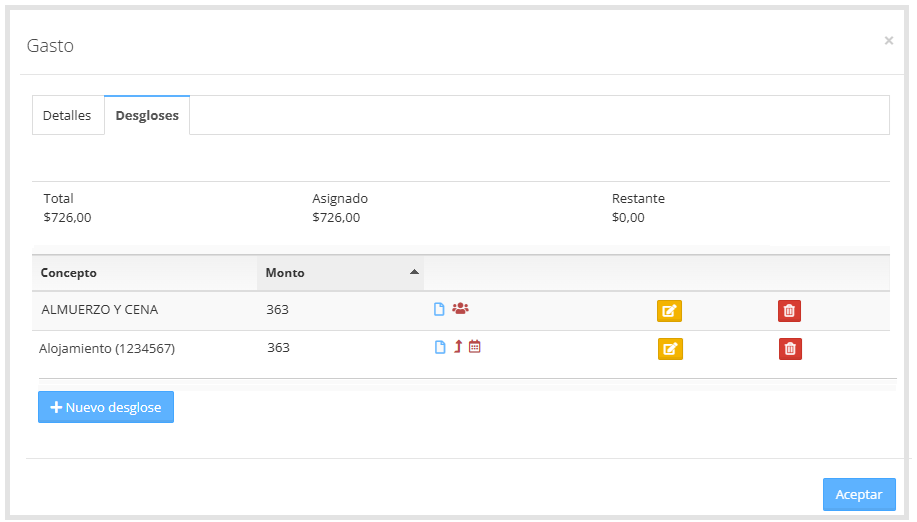
The amounts shown in this section:
Total: original total amount of the expense to be broken down.
Assigned: sum of the amounts entered in the itemization lines.
Remaining: difference between Total and Assigned — this is the amount still to be broken down. It must reach 0.00 for the itemization to be complete.
All lines must add up to the total amount of the main expense, as shown below.
Once all itemizations have been entered and you click Accept, the system will redirect you to the expense report detail screen.
Where you will see the following icon, located on the right side, as shown below.
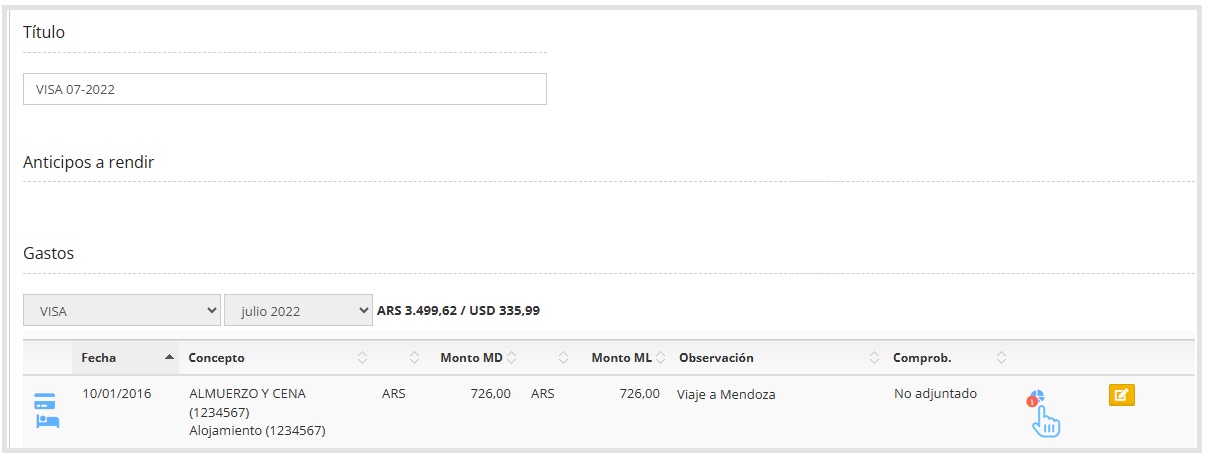
This icon indicates that the expense has an itemization and may include additional details such as loaded taxes, daily limit overages, among others.
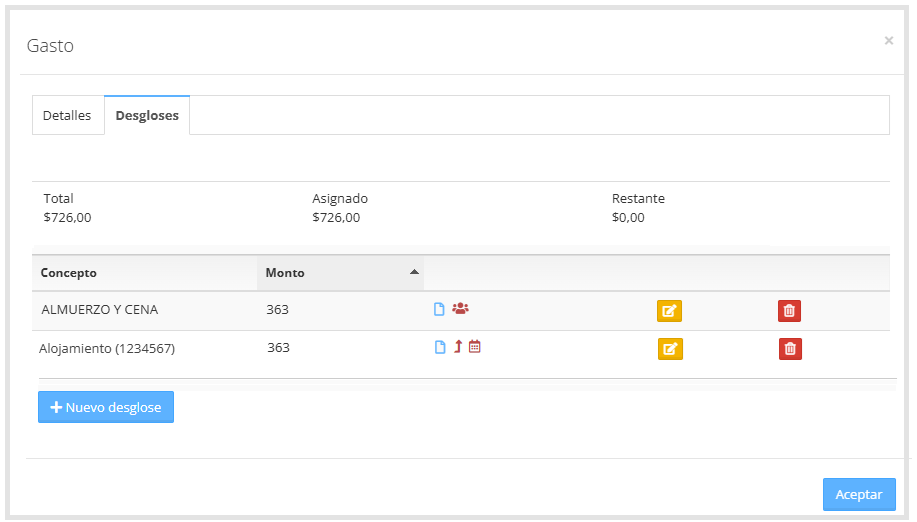
By clicking on the icon, you will be taken to the itemization screen, where you can view the loaded information, with the option to edit or delete individual itemizations.
Below you will find the following Corporate Card Expense Report video.