Create new user: To create a new user, go to Admin > User and click the [+] icon.

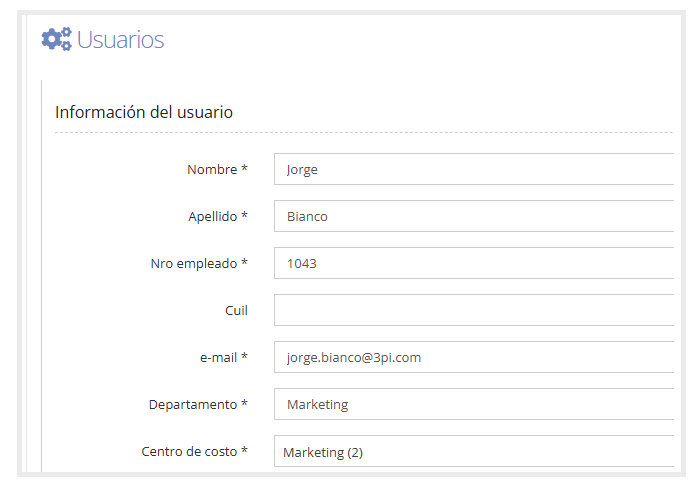
User information: In this section, you must fill in at least all the required fields, which are marked with an asterisk (*).
As shown in the image below.
Can report expenses to other cost centers: If this option is not enabled, the user can only report expenses to their own cost center.
If enabled, a selector will appear on the expense form so the user can choose from other available cost centers.

As shown in the image below:

For more information, see the Cost Centers guide.
If Allocations has been configured and the option Can report expenses to other cost centers is enabled, the cost center selector will no longer be shown as a separate field. The cost center selection will be made within the Allocations section, in the expense form.
As shown in the image below.

Category limit per expense: Assigns the per-expense limit category to restrict the amounts a user can report per category and limit the visible categories. If the expense exceeds the allowed amount, a text box is shown in the expense form for the user to justify the reason.

As shown in the image below.

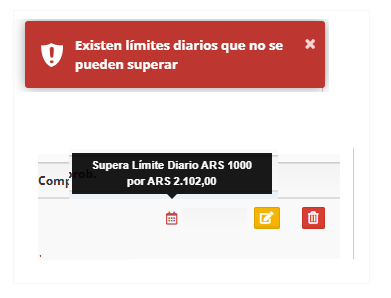
Category limit per day: Assigns the per-day limit category to restrict the total daily amount a user can report for a category. If the limit is exceeded, an icon is shown with the excess amount detail, along with an error message indicating that the allowed daily limit has been exceeded.

As shown in the image below.
For more information, see the guide Category Limits, which explains how to set up this configuration.
Company: Select the company the user belongs to.

Profile: In this section, select the type of profile the user will have.

The role of each profile is detailed below:
Administrator:
Has access to the admin menu. Can configure and set up the entire tool, view all cash advances and expense reports, and modify assigned approvers.
User:
Can log in to the system to request cash advances, report expenses, and act as an approver for other users.
User without entry permission:
Can log in to the system only to approve expense reports and/or report on behalf of another person. Cannot report expenses on their own behalf.
Chart of Accounts Administrator:
The "Chart of Accounts Administrator" profile provides access to the settings related to the accounting structure within the Admin menu.
Cost Center: creation, editing, and management of the cost centers used to charge expenses.
GL Account: creation and configuration of GL Accounts.
Category: creation and setup of expense categories linked to GL Accounts.
Chart of Accounts Administrator + User:
The "Chart of Accounts Administrator" profile provides access to the settings related to the accounting structure within the Admin menu.
Cost Center: creation, editing, and management of the cost centers used to charge expenses.
GL Account: creation and configuration of GL Accounts.
Category: creation and setup of expense categories linked to GL Accounts.
Users: creating, deactivating, and modifying users, as well as assigning profiles and permissions within the system.
Accounting:
Takes part in the final stage of the approval workflow. Approves when the expense report is in Pending Finance status, can upload the card statement, and can mark physical receipts as submitted.
Treasury:
Updates the status of cash advances to To Report and expense reports to Reported, once payments have been made.
Finance:
Has the combined functions of the Accounting and Treasury profiles. Can review, approve, and update the status of cash advances and expense reports.
Auditor:
Can view all cash advances and expense reports, but cannot modify or approve them. Has access to the history and full payroll reporting.
Super Approver:
Can approve any cash advance or expense report, even if it's in Pending or Pending Finance status. Can move them directly to Approved status.
General Services:
Can mark physical receipts as submitted, with no access to other system functions.
General Finance:
Has access to all countries, and can perform all actions associated with the Finance profile in each of them.
General Auditor:
Has access to view cash advances and expense reports from all countries, with the same restrictions as the Auditor profile.
Payment account: Select the payment account that will appear by default when Finance or Treasury approve the user's cash advances or expense reports. This field will only be visible if there are GL Accounts with the "Is payment" option checked.

For more information, see the guide GL Accounts, which explains how to set up this configuration.
Reports Kilometers: This option must be enabled if the user is going to report kilometers. Once enabled, the monthly estimate field and the corresponding category must be completed.

For more information, see the guide Km rate, which explains how to set up this configuration.
Benefits: If benefits have been created, this setting enables the user to use the assigned benefit(s).

For more information, see the guide Benefits, which explains how to set up this configuration.
Corporate cards:
If the user has corporate cards, this section will show the assigned card, along with the option to mark whether they can assign expenses to other people.

For more information, see the guide Corporate Cards, which explains how to set up this configuration.
Approvers: You can assign a primary approver and an alternate. Both will be able to approve, but only the primary approver will receive notifications by default. The alternate will start receiving them once the primary approver enables the "Out of Office" option.

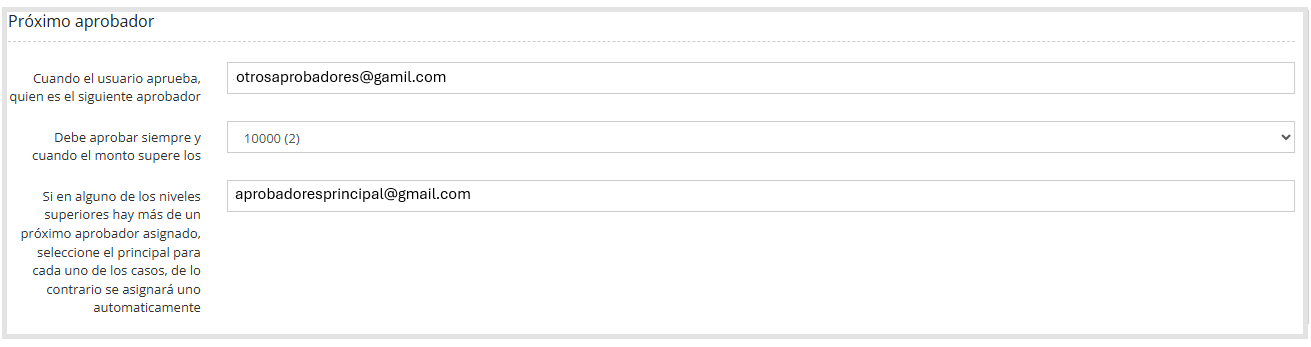
Next Approvers: This section is used only if the next approver module is enabled. It allows defining a multi-level approval workflow that can depend on the amount of the request.
When the user approves, who is the next approver: Lets you assign the approver who should take part at the next level, once the user being edited has approved the request.
Must approve only if the amount exceeds: Select the amount the request must exceed for the user selected in the previous field to need to approve.
If any of the higher levels has more than one next approver assigned, select the primary one for each case; otherwise, one will be assigned automatically: Lets you designate a primary approver when there are several possible next approvers at a higher level. If none is chosen, one will be assigned at random.
Assistant: You can select an assistant to request cash advances and report expenses on behalf of the user. Cash advances and expense reports submitted by the assistant will be received by the user for review and validation, who must then submit them for approval. If the "Full access" option is checked, the validation step is skipped and the approval request is sent directly by the assistant.

User deletion: Deleting a user blocks access to T&E Express, but no cash advance or expense report is removed from their history. Deleted users don't count as active users for billing purposes.
Reactivate user: To recover deleted users, select the corresponding status from the status filter in the upper left corner and click Search.
As shown in the image below.
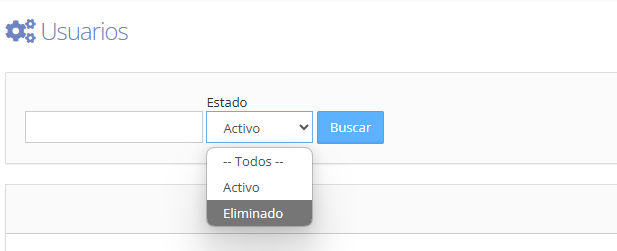
Once inside the Deleted status, the deleted users will be shown as a list.
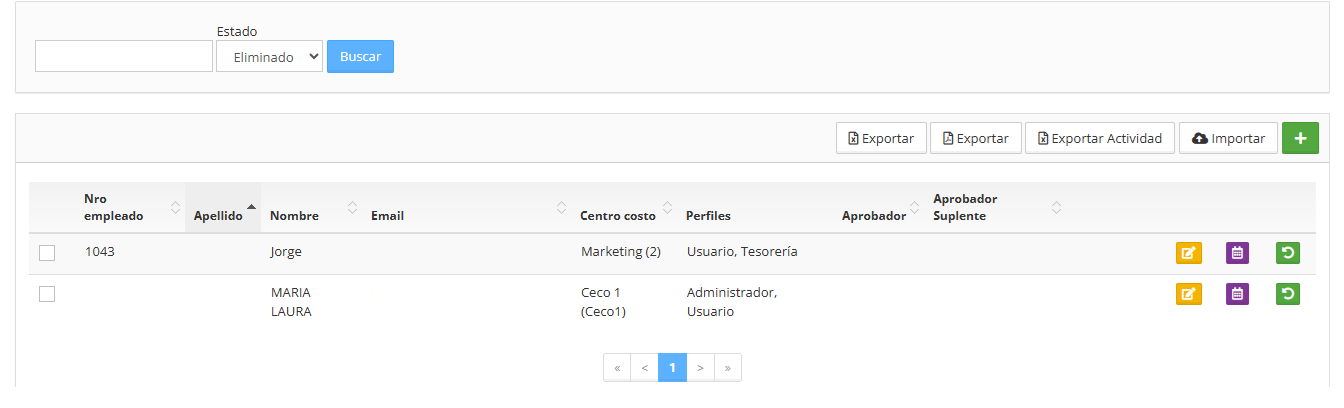
Select the corresponding user and click the green icon to restore.

As shown in the image below
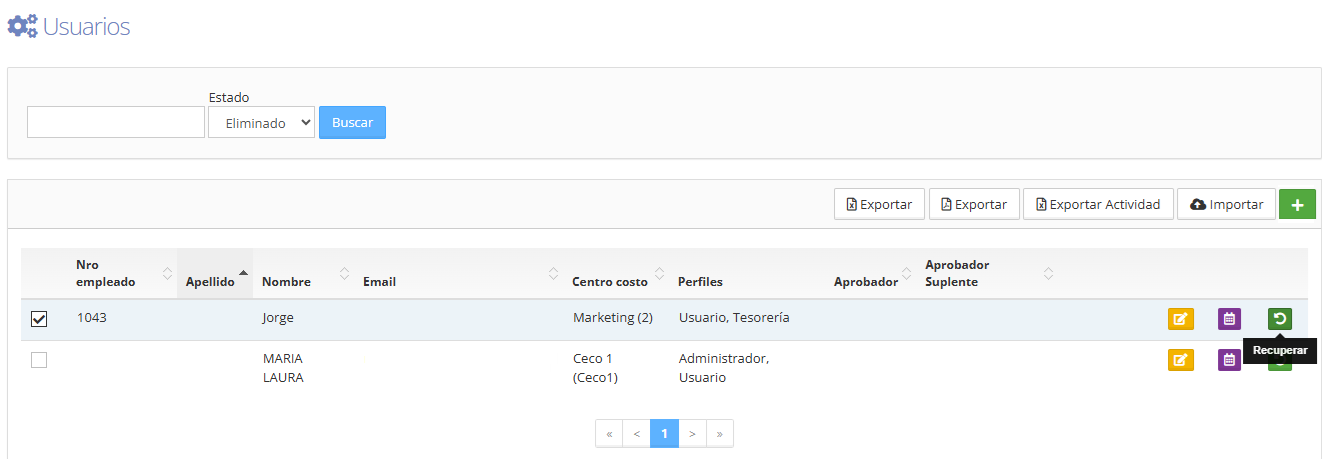
Clicking Restore will change the user's status to active.
User list: In the upper right corner of the user screen, you'll find a series of buttons that let you perform different actions.
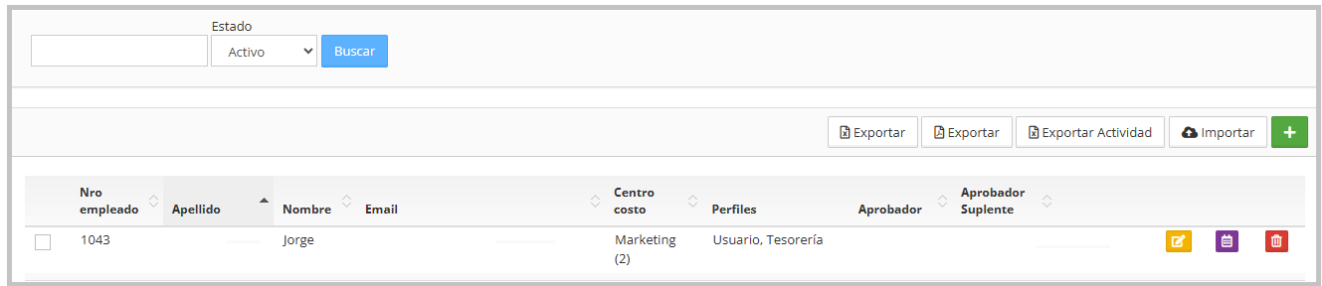
Export: downloads all the users' information and configuration in Excel or PDF format.
Export Activity: downloads a file with the last login recorded for each user.
Import: lets you upload users from an Excel file (.xlsx).
Clicking this button opens a window where you can:
Select the file to import from your computer
Download the corresponding template file from T&E Express.
Confirm the upload with the Import button, or cancel it.
On the right side of each user, you can perform the following action:
Edit

Allows editing the user's data.
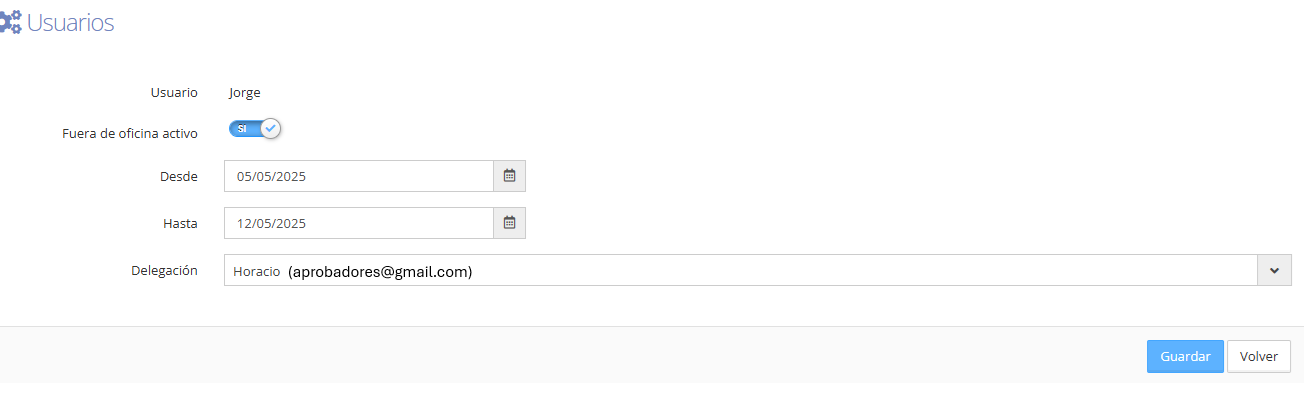
Out of Office

Allows enabling or disabling Out of Office; approval can be delegated to another user so the approval workflow continues.
As shown in the image below
Delete

Changes the user's status to "Deleted".