This section explains how to use the MagicScan feature to simplify receipt uploads. It walks through the steps to scan a receipt and automatically generate an expense with the merchant, date, and amount, which is then automatically added to the user's account in T&E Express.
T&E Express app download: To use MagicScan, you need the T&E Express mobile app. You can download it from:
Google Play Store (for Android)
App Store (for iOS)
Using MagicScan:
Log in with your T&E Express username and password.

Once logged in, tap the three lines ☰ in the upper left corner of the screen, as shown below.

In the drop-down menu, select Expenses.
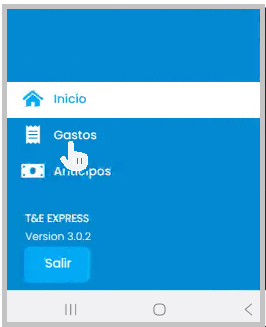
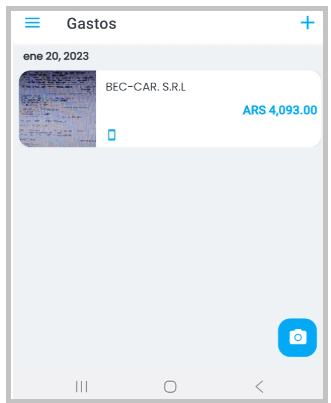
The Expenses screen will open, where you'll see the camera icon button in the lower right corner.

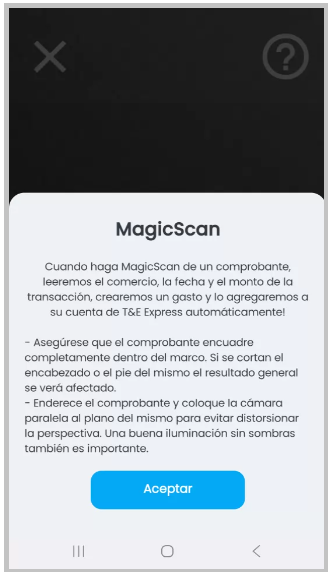
The phone's camera will open so you can take a photo of the receipt. On this screen you'll also see the (?) symbol with a brief help guide on how to use MagicScan, or you can close the screen with the X.
The expense syncs automatically with T&E Express.

MagicScan then processes the receipt image.

T&E Express will automatically return the data extracted from the receipt, such as merchant, date, and amount.
If the process takes too long or you'd rather not wait, you can open the expense detail by clicking "Complete detail manually."

The following fields must be completed:
Amount: the amount shown on the receipt.

Date: select the receipt date.

Type: select the type of expense.

Comment: merchant name.

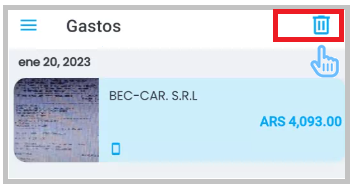
If you need to delete an expense, press and hold it for a few seconds. The delete icon will appear in the upper right corner of the screen.
Tips for better scanning:
Clean your phone's camera lens.
Make sure the receipt is completely within the camera frame; if the header or footer is cut off, the result may be affected.
Straighten the receipt and hold the camera parallel to it to avoid distortion.
Use good lighting and avoid shadows on the receipt.